Installation
Connecting the MDB adapter
The MDB adapter sits between your SENVEND payment terminal, the vending machine and the cash devices. Here is what it does and how you connect it.
Overview
What the MDB adapter does
The adapter has two jobs.
A stable connection to the machine
On many vending machines the adapter improves the communication between card payment, age verification and the machine. On some machines it is what makes that communication possible in the first place.
Master telemetry
Coming soon
In the near future the adapter will make master telemetry possible. The guide for that will follow here.
Connections
The sockets on the adapter
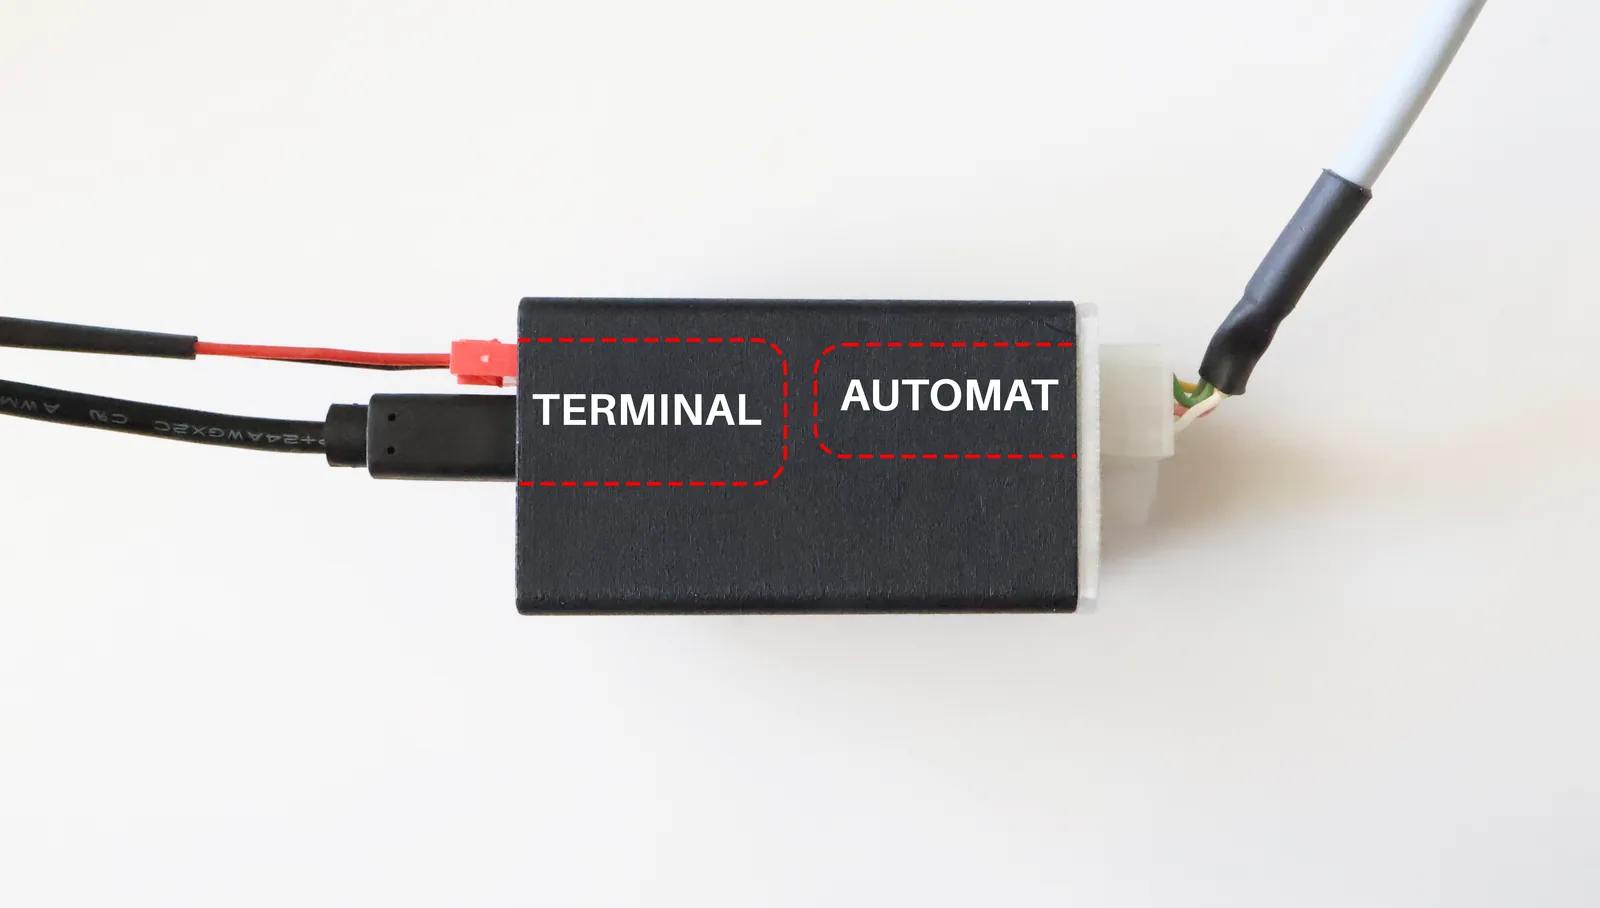
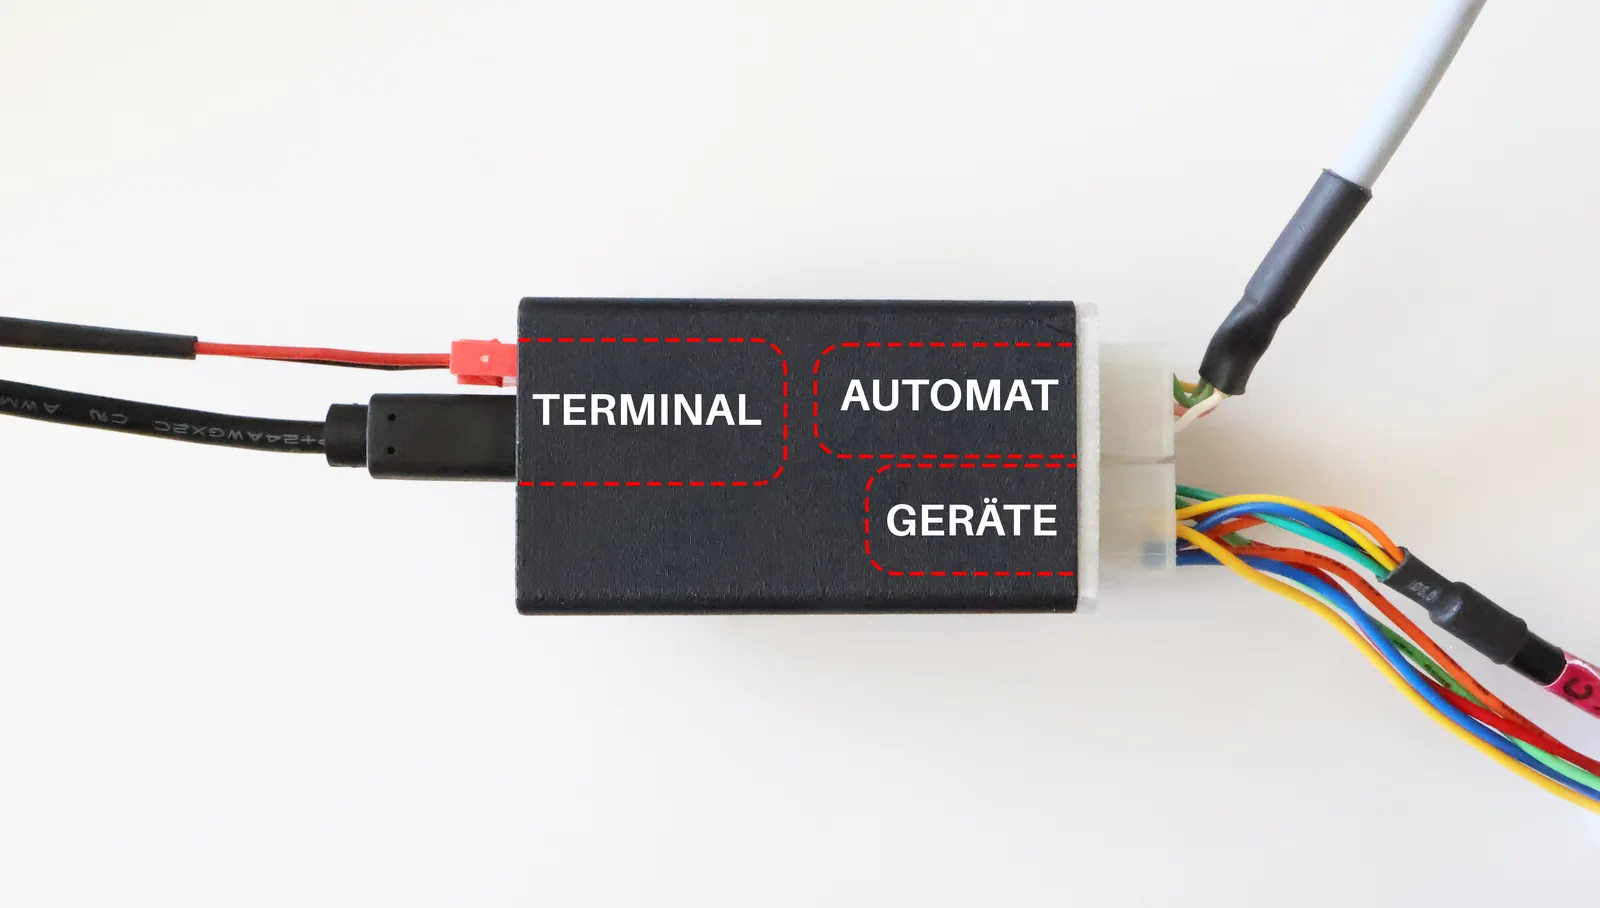
Hold the adapter so that the latches of the MDB connectors point downwards. Seen from above, the MDB power cable is then on the right. In that view the right MDB socket belongs to the vending machine and the left one to the cash devices.
View of the MDB sockets with the latches at the bottom: 1 cash devices, 2 vending machine
Guide
Connecting the adapter in seven steps
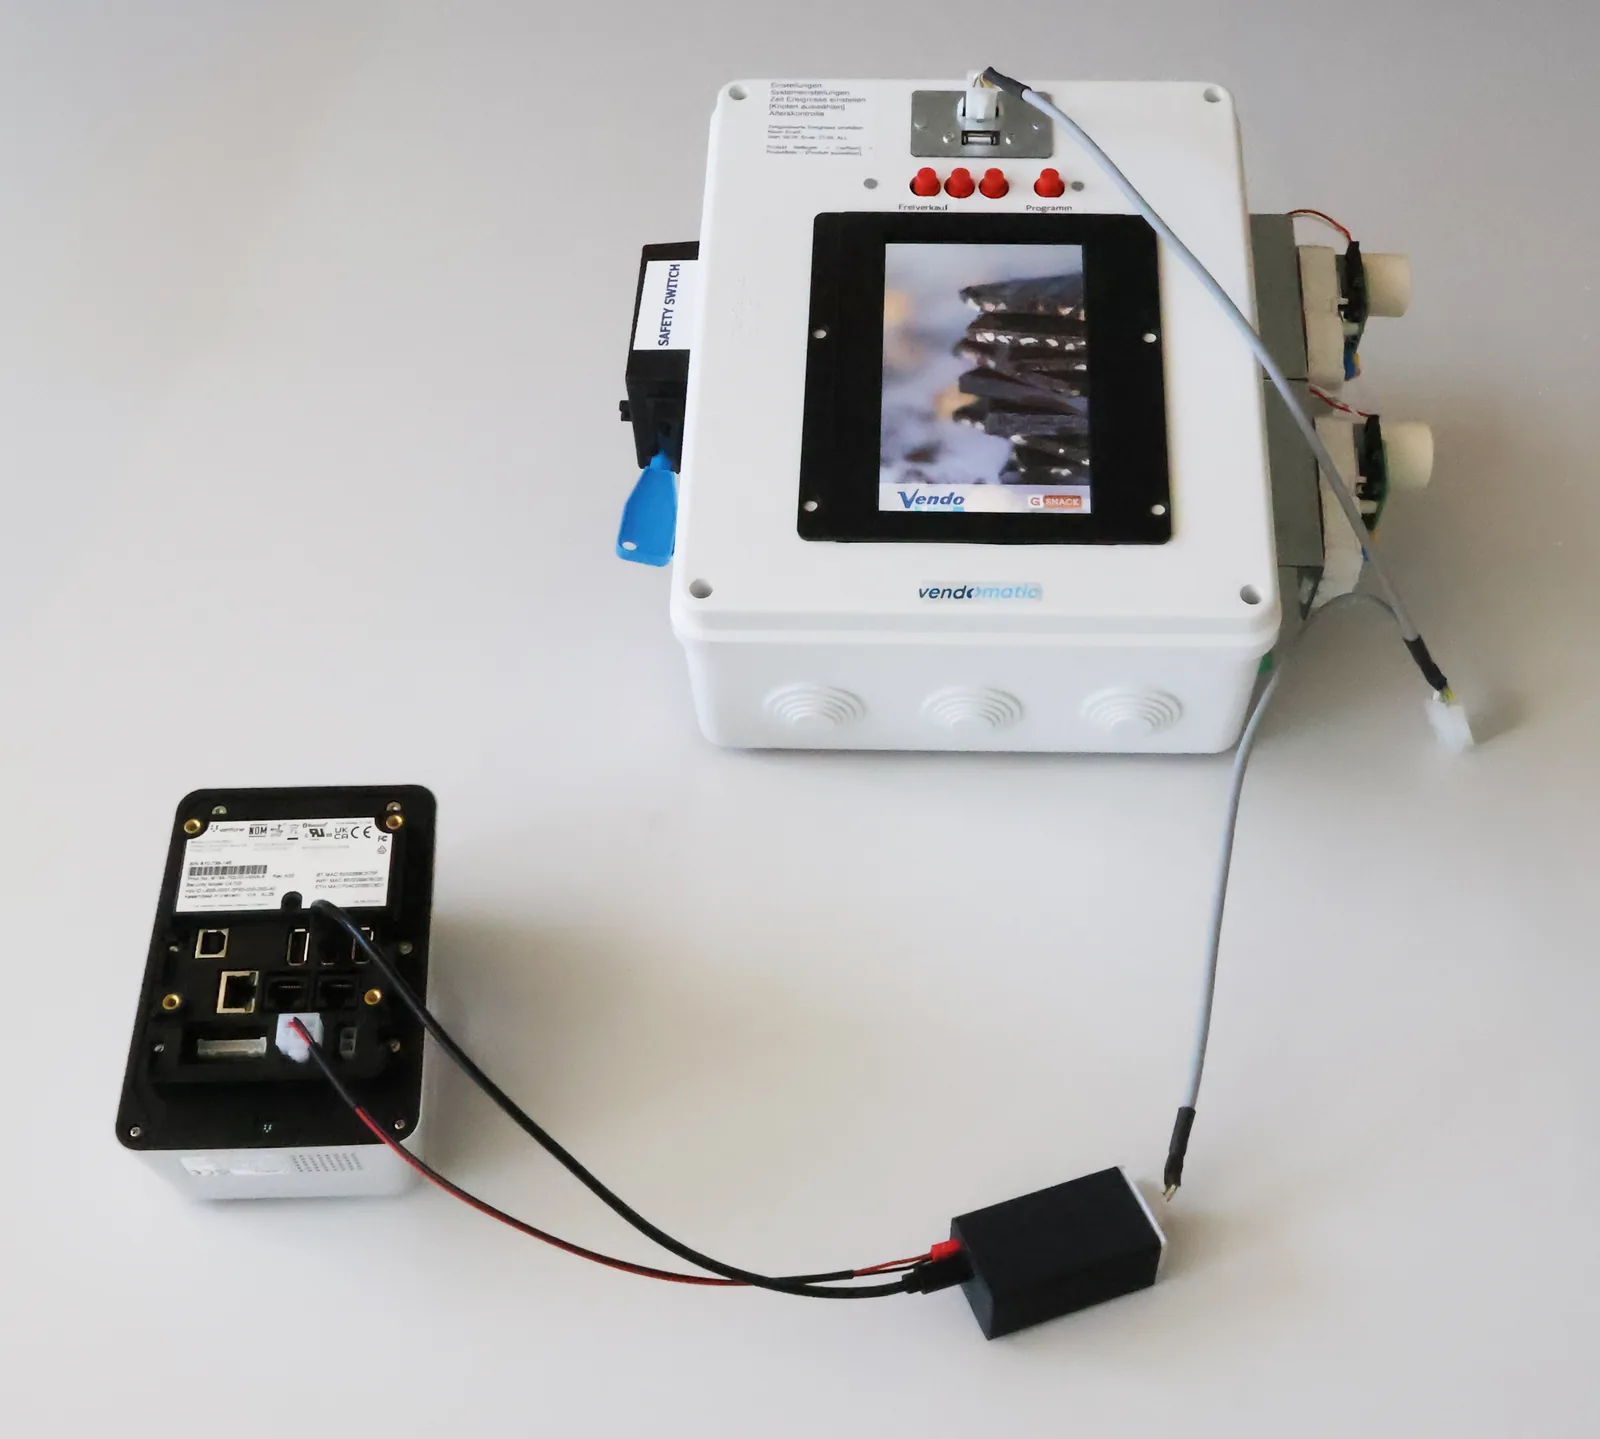
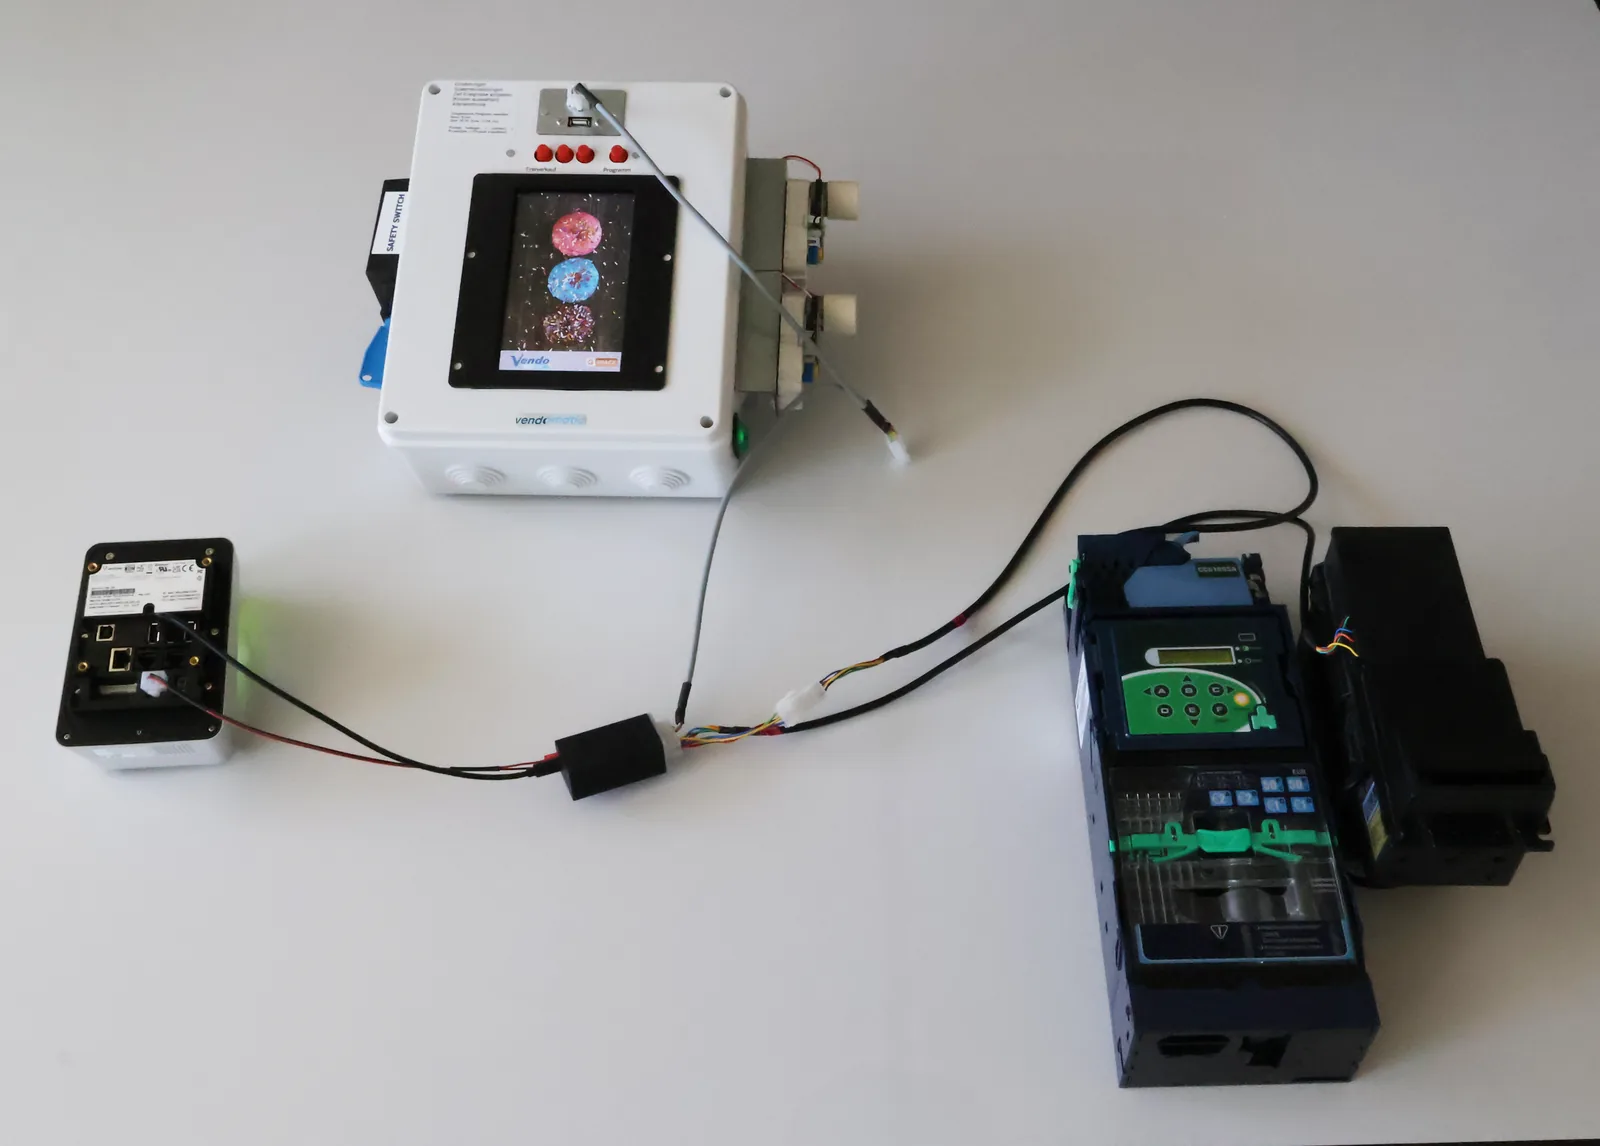
How the SENVEND terminal, the MDB adapter, the vending machine and the cash devices are wired together.
Switch the vending machine off
Switch your vending machine off before you unplug anything.
Unplug the existing MDB cable from the terminal
If your SENVEND terminal has been connected to the machine directly via MDB so far, unplug the MDB cable from the terminal.
Connect the terminal to the adapter via USB
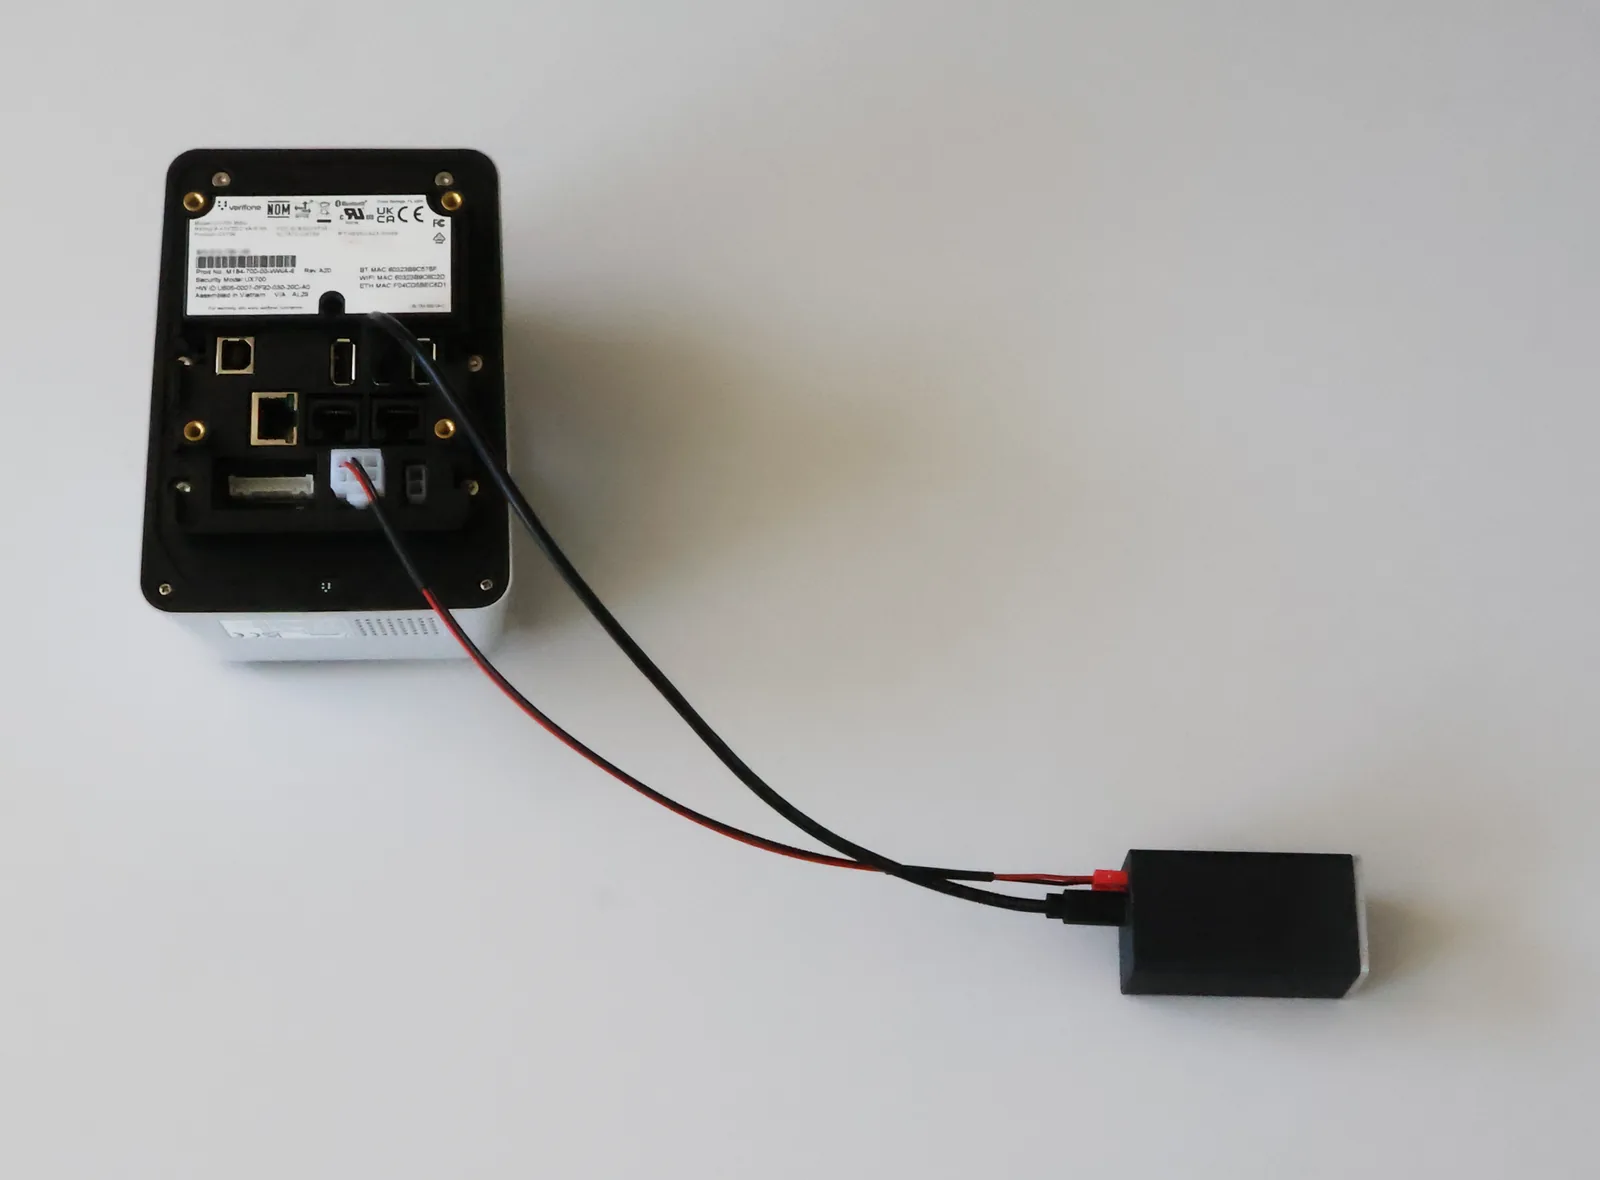
Connect the SENVEND terminal to the adapter with a USB cable: USB A on the terminal, USB C on the adapter. It does not matter which of the USB ports you use on the terminal. The photo below shows both cables: the USB cable and the MDB power cable from step 4.
Supply the adapter with power
Connect the adapter to the SENVEND terminal with the MDB power cable that came with it. That cable has a two-pin red plug on the adapter end and an MDB plug on the other end, which goes into the MDB socket of the terminal. The photo shows both cables on the terminal: the USB cable and the MDB power cable.
Connect the vending machine to the right MDB port
Connect your vending machine (VMC) to the adapter with the MDB connection cable that came with it. Use the right MDB port. You are looking at the adapter the right way round when the latches are at the bottom and the MDB power cable is on the right.
Connect the cash devices to the left MDB port
Connect your cash devices such as the coin changer and the bill validator to the adapter. Use the left MDB port, again with the latches at the bottom.
Switch the vending machine back on
Switch the machine back on and use a test sale to check that card payment and the cash devices work.
Questions about the installation?
Write to us via the help form or get in touch directly – we’re happy to help.

Installation
Connecting the MDB adapter
The MDB adapter sits between your SENVEND payment terminal, the vending machine and the cash devices. Here is what it does and how you connect it.
Overview
What the MDB adapter does
The adapter has two jobs.
A stable connection to the machine
On many vending machines the adapter improves the communication between card payment, age verification and the machine. On some machines it is what makes that communication possible in the first place.
Master telemetry
Coming soon
In the near future the adapter will make master telemetry possible. The guide for that will follow here.
Connections
The sockets on the adapter
Hold the adapter so that the latches of the MDB connectors point downwards. Seen from above, the MDB power cable is then on the right. In that view the right MDB socket belongs to the vending machine and the left one to the cash devices.
View of the MDB sockets with the latches at the bottom: 1 cash devices, 2 vending machine
Guide
Connecting the adapter in seven steps
How the SENVEND terminal, the MDB adapter, the vending machine and the cash devices are wired together.
Switch the vending machine off
Switch your vending machine off before you unplug anything.
Unplug the existing MDB cable from the terminal
If your SENVEND terminal has been connected to the machine directly via MDB so far, unplug the MDB cable from the terminal.
Connect the terminal to the adapter via USB
Connect the SENVEND terminal to the adapter with a USB cable: USB A on the terminal, USB C on the adapter. It does not matter which of the USB ports you use on the terminal. The photo below shows both cables: the USB cable and the MDB power cable from step 4.
Supply the adapter with power
Connect the adapter to the SENVEND terminal with the MDB power cable that came with it. That cable has a two-pin red plug on the adapter end and an MDB plug on the other end, which goes into the MDB socket of the terminal. The photo shows both cables on the terminal: the USB cable and the MDB power cable.
Connect the vending machine to the right MDB port
Connect your vending machine (VMC) to the adapter with the MDB connection cable that came with it. Use the right MDB port. You are looking at the adapter the right way round when the latches are at the bottom and the MDB power cable is on the right.
Connect the cash devices to the left MDB port
Connect your cash devices such as the coin changer and the bill validator to the adapter. Use the left MDB port, again with the latches at the bottom.
Switch the vending machine back on
Switch the machine back on and use a test sale to check that card payment and the cash devices work.
Questions about the installation?
Write to us via the help form or get in touch directly – we’re happy to help.